
FREQUENTLY ASKED QUESTIONS
WEATHERWOOD / TECHNICAL RESOURCES
Answers about tannin-reactive stains, oil stains, maintenance oils, topcoats, and exterior protection: preparation, application, wood species, and troubleshooting. For project-specific guidance, use the links to our technical application pages or send our team your wood species and sample photographs.
Understanding Reactive Wood Stains
What is a tannin-reactive wood stain?
A tannin-reactive wood stain changes the appearance of wood through a chemical reaction with naturally occurring wood tannins rather than relying primarily on an opaque layer of surface pigment. Weatherwood's water-based reactive stains create transparent, aged-wood tones that preserve visible grain. Because species and natural tannin content differ, always test on your actual material. Learn more in our reactive stain application guide.
How does Weatherwood achieve an aged wood finish in one staining step?
Weatherwood develops its transparent aged-wood color in a single reactive staining operation: you apply the stain by brush, rag, spray, or flood, and the color develops as the wood dries. You do not need to pretreat the wood or deactivate the stain afterward. One-step staining is not a complete one-step finishing system, though. Surfaces still need preparation and, in most cases, a compatible protective topcoat.
What is the difference between reactive stain and conventional pigmented wood stain?
Conventional stains typically use pigments and/or dyes to introduce color. Weatherwood reactive stains rely on interaction with the wood to develop aged-looking tones, which makes wood species and surface preparation especially important. Neither approach is right for every project; the best choice depends on the desired look, the substrate, the production method, and maintenance requirements. Advice written for conventional wiping or gel stains, such as pre-conditioning, often does not apply to a reactive stain.
Are Weatherwood reactive stains suitable for architects and OEM manufacturers?
Yes. Weatherwood provides transparent reactive wood finishes for architectural millwork, cabinetry, furniture, flooring, and manufacturing projects, with brush, spray, and flood/submerge application methods. For a specification or OEM project, contact our team with your wood species, intended use, finish target, anticipated volume, and sample requirements.
What is the difference between Weatherwood reactive stains and Weatherwood oil stains?
Reactive stains develop color by reacting with the tannins in the wood, so the result changes with each wood species. Weatherwood oil stains (Ebony Black, Natural Clear, Rustic Walnut, and White Pickling) are oil-based stains that add color with penetrating oils. Both can be applied to raw wood, and oil stains can also go over Weatherwood-stained wood. See the oil stain questions below, or compare reactive colors on our color chart.
Colors, Wood Species & Samples
Why does the same reactive wood stain look different on oak, maple, or pine?
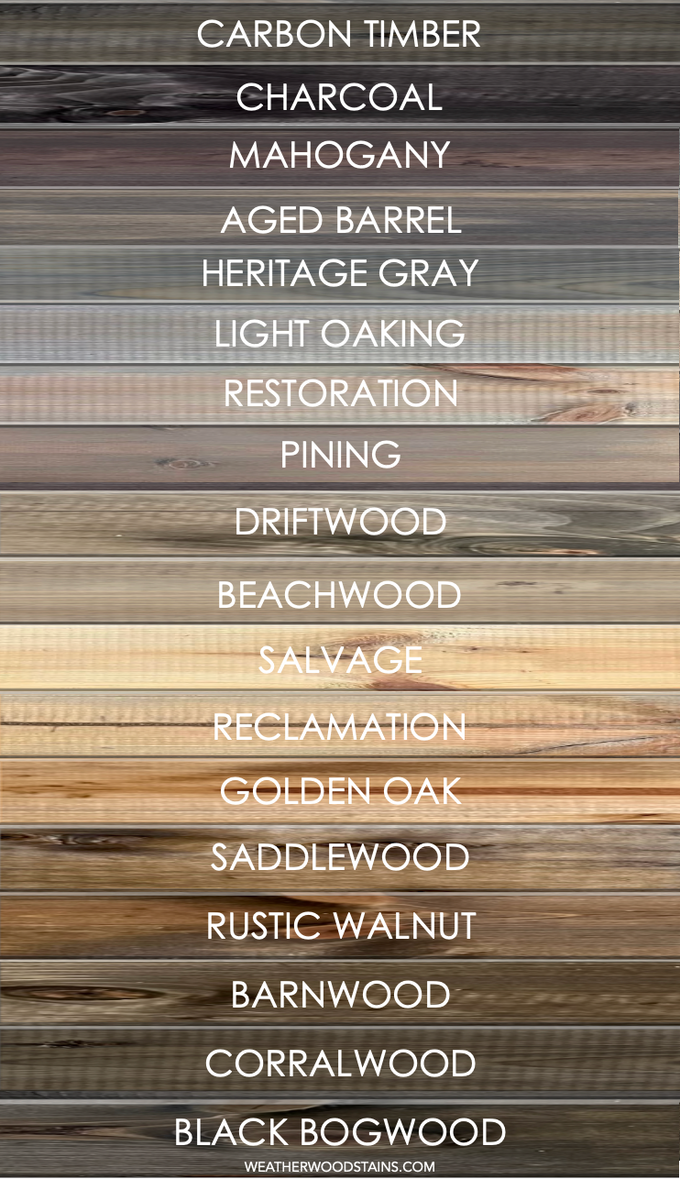
Reactive stains respond to the characteristics of the wood, including species, tannin content, grain, age, and surface preparation. Knotty pine, clear pine, and different boards of the same species can produce noticeably different results. Compare the Weatherwood color chart by wood species, then test several pieces of your actual project material with your intended protective finish.
Which Weatherwood stain should I use to age or gray oak?
Several colors are commonly used to gray oak: Light Oaking (light, all-over gray; can be layered for darker shades), Heritage Gray (mid-tone grays), Salvage (medium gray and brown tones; can be layered), Driftwood (light driftwood grays), and Restoration (sandy brown with gray tones). Results differ between red oak and white oak, so check the color chart and test a sample under your project lighting with your topcoat.
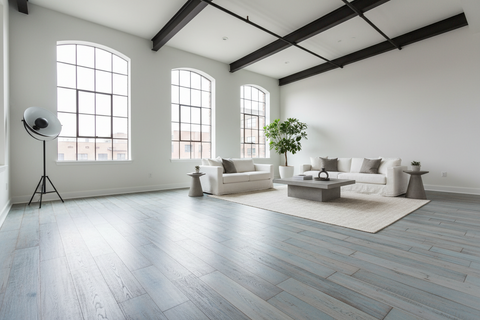 Light Oaking
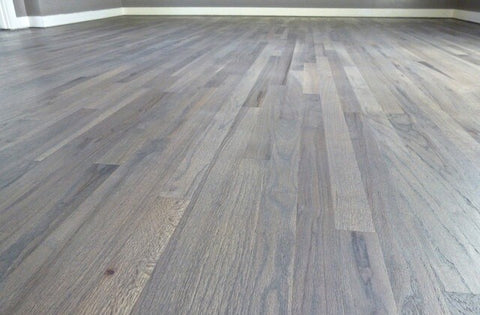 Heritage Gray
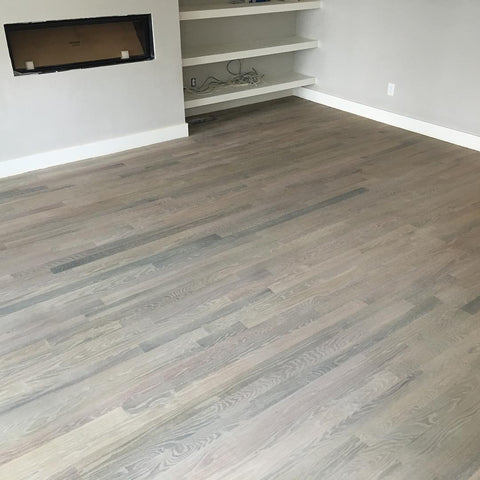 Salvage
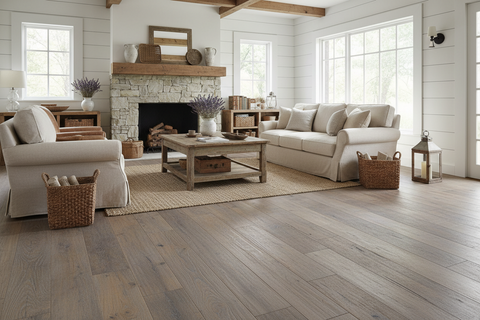 Driftwood
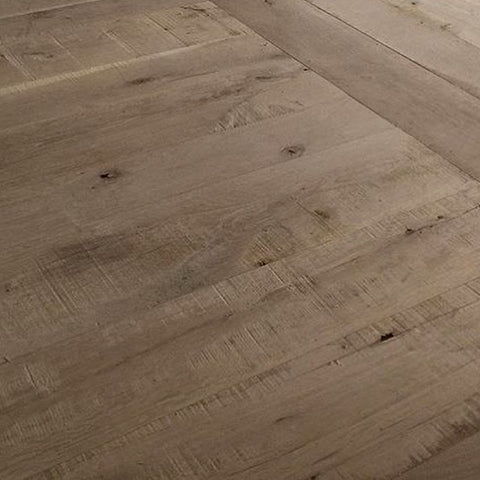 Restoration
Can Weatherwood stain pine or knotty pine?
Yes. Each Weatherwood stain is shown on pine in our color chart, but the result depends on the type of pine, knots, and grain. Knotty pine may show warmer or more varied tones than clear white pine. Make several samples that include knots and representative grain before committing to a ceiling, wall, or furniture project.
Can reactive wood stains be used on hard maple without blotching?
Our color chart includes examples on maple, but hard maple needs careful sample testing because its dense grain and local variations can affect color development. Test multiple boards using the same sanding schedule and application method you plan to use. Do not use a wood conditioner or primer: they close the pores and reduce the reaction.
My sample looked great, but my project is a different color. Why?
This usually happens when a small sample does not capture the natural variation in the project wood, especially with cedar and Douglas fir. Make larger samples from several planks so you can see the realistic highs and lows of the species, and include your final topcoat. For production work, document wood source, preparation, application amount, stain batch, conditions, and the approved sample.
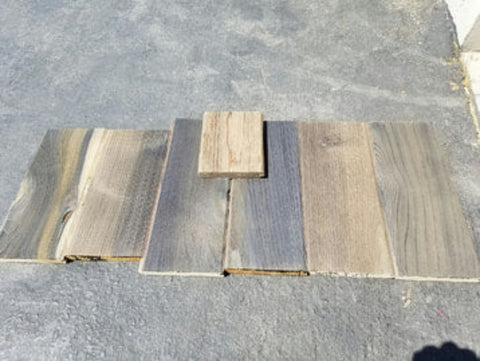
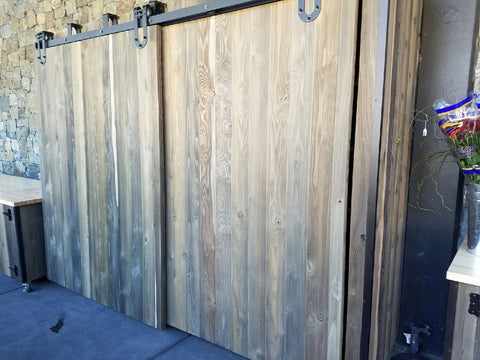
What if I have new and old wood in the same project?
Wood tannins age with the wood, so new and old boards can react differently. Test the stain on several planks of each, then test with the maintenance oil or topcoat you plan to use so you can judge the final color range.
Can I layer or mix Weatherwood stain colors?
Yes. Weatherwood stains are compatible with each other and can be layered or combined into custom shades. Examples on our FAQ page include Restoration + Light Oaking on oak and Salvage + Restoration on walnut. When mixing, start with teaspoon-level test batches to build a ratio, document it, and test on your actual wood before scaling up. Weatherwood reactive stains are also compatible with water-based pigments and powdered dyes, but altering the formula is at your own risk and altered products cannot be warrantied.
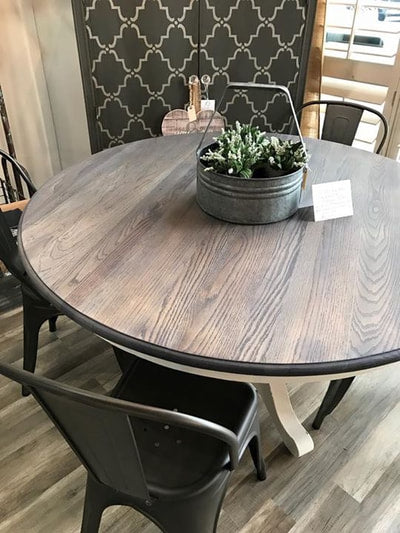 Restoration + Light Oaking on oak
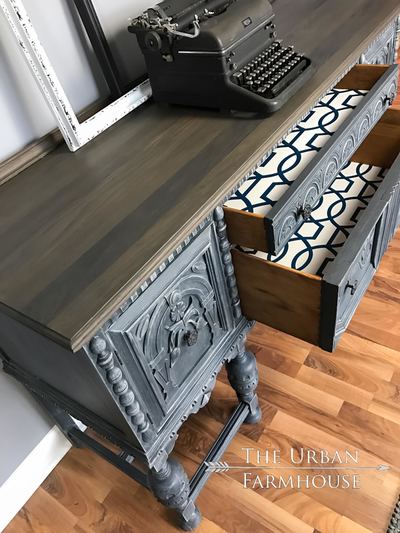 Salvage + Restoration on walnut
Can I buy a stain sample before ordering?
The smallest size we sell is a quart, because reactive stains are active products and are not packaged in smaller sizes for regular sale. A discounted Weatherwood sample pack lets you test multiple colors. After narrowing your options, test with the topcoat you plan to use, since topcoats protect the color and can affect the final look. Because results vary by species, we strongly recommend testing before placing larger orders; all sales are final. Contact us if you want help choosing.
Preparation & Reactive Stain Application
What grit should I sand to before applying reactive stain?
For new, raw wood, sand with 60–80 grit to open the grain. Do not sand above 120 grit or color will be reduced; fine sanding can seal the wood. Sanding is not necessary on rough-cut, wirebrushed, or rough-sawn lumber. For floors, sand between 100–120 grit (220 grit may seal the wood). If you want a smoother surface, you can sand to 120 grit before staining, then do a light finish sand with 320 grit once the stain is fully dry to knock down raised grain. See the reactive stain application guide.
Should I water-pop the wood before staining?
Water-popping (lightly wetting the wood to raise the grain) is optional on most projects and can help deeper penetration. For hardwood floors it is recommended. Test on a scrap of your wood first.
Can I apply reactive stain over varnish, polyurethane, or an existing stain?
For reliable reactive staining, remove the existing coating and prepare the surface back to clean, raw wood. Strip and/or sand to raw wood; if you use a chemical stripper, sand afterward with 60–80 grit to remove residue. Old sealers, conditioners, adhesives, or finishing residue can prevent uniform contact with the wood. A surface that looks bare is not always uniformly absorbent, so test a prepared area first.
Should I use a wood conditioner or primer before reactive stain?
No. Do not use wood conditioners or primers before Weatherwood reactive stain. They close the wood's pores and reduce the reaction that creates the color. Advice for conventional pigmented or gel stains may not apply to a tannin-reactive product.
Should I wipe off Weatherwood reactive stain after applying it?
Not for normal application. The two rules of Weatherwood reactive stain are: apply a generous, even coat, and do not wipe it back off, so the wood absorbs the stain naturally. Use a wet brush to remove standing puddles or bubbles while keeping a wet edge. There is a deliberate special-effect exception for achieving lighter shades; see the next question.
Can I wipe back reactive wood stain to get a lighter shade?
Yes, as an intentional special-effect technique for lighter shades, not as the routine method. Apply the stain and wipe away excess before the reaction fully develops. This can affect evenness, so test it on the exact wood species and preparation you plan to use and keep the technique consistent across the project. Accidental or inconsistent wipe-back is a common cause of spotty color.
What are other ways to get a lighter shade with reactive stain?
Besides a deliberate wipe-back, you can: (1) bleach the wood before staining, most effective on high-tannin species such as oak, which changes the result compared with our standard color chart; (2) soften and lighten the stained wood afterward with White Maintenance Oil; or (3) test a controlled dilution with water or a compatible water-based tint in a small batch. Diluting or tinting alters the formula, so document your ratio, test on your actual wood first, and note that altered products cannot be warrantied. Contact us before changing the formula for a production job.
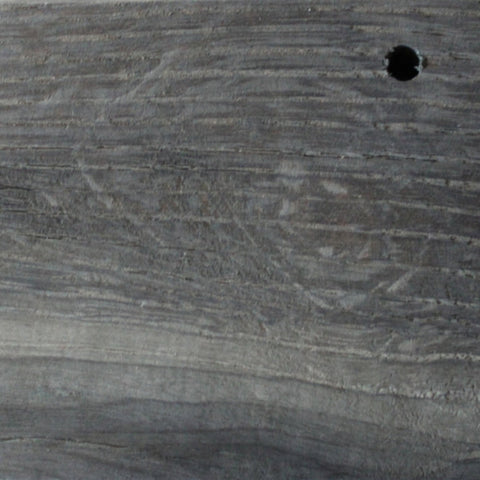 Reclamation on white oak
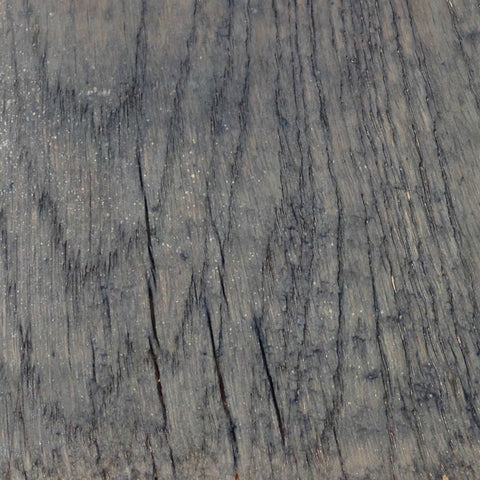 Reclamation on bleached white oak
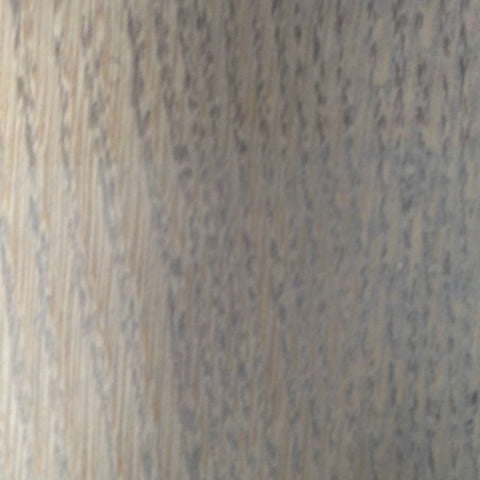 Reclamation on white oak, wiped back
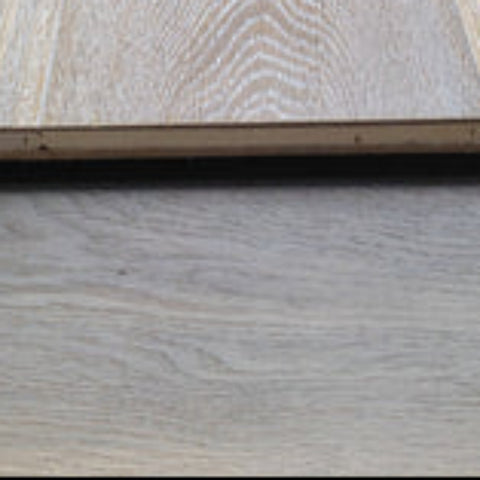 Watered-down Reclamation on white oak
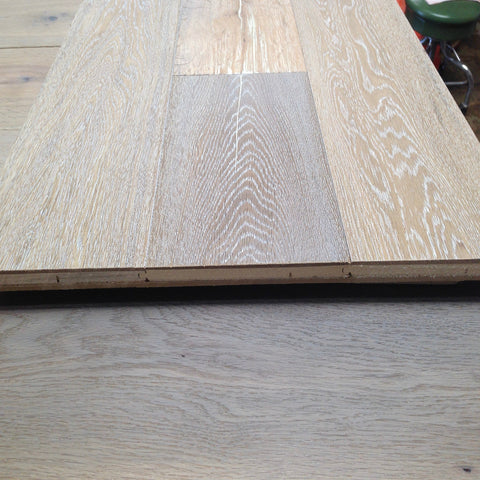 Watered-down Reclamation, hand applied to white oak
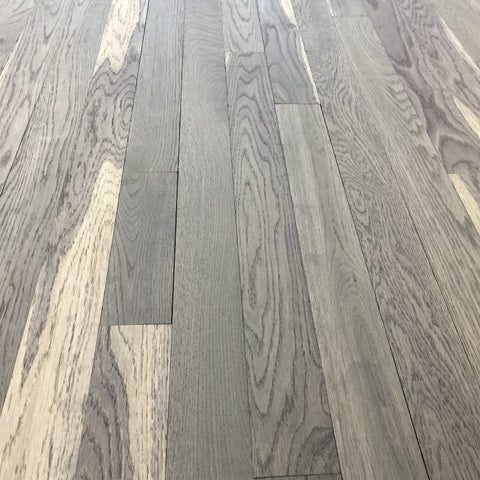 White oak, UV flooring line
How many coats of reactive stain do I need?
One generous coat creates the color. A second coat is generally recommended when refinishing wood and when you want the darkest shade. Results vary by stain color and species, so check the individual color page and test first.
What temperatures and materials should I avoid when staining?
Do not apply below 50°F. Do not let the stain contact metal or store it in metal containers. Pour what you need into a separate plastic container and keep the original tightly sealed, and do not pour used stain back into the can. Use a new brush and never cross-contaminate with pigment-based products. Mix and strain the stain before and during use. Reactive stain can stain concrete, clothing, and floors, so protect surrounding surfaces.
How long does reactive wood stain take to dry before topcoating?
The reactive process is complete when the wood is fully dry. Typical dry time is 30 minutes to 2 hours, depending on species, softness, climate, and project scale. As a general guide, hardwoods may dry in about 30 minutes and softwoods in about 60 minutes. Floors typically need 2–4 hours. Warm temperatures and air circulation speed drying; humidity and temperatures near 50°F slow it. Allow the wood to dry fully before topcoating.
Can reactive stain be sprayed or used on a production line?
Yes. Weatherwood documents brush/rag, spray, and flood/submerge methods. For spraying, use an atomized gun, open the nozzle completely to drench the surface, and apply a heavy coat, typically 6–8 consecutive passes with overlap. For flood or submerge lines, make sure lines are flushed clear of traditional stains, remove bubbles, do not wipe off, and air dry on racks without stacking wet wood; leaving wood in too long can cause water marks. For OEM line trials, contact us with your wood species, equipment, and volume.
Can I use reactive stain on pre-installed (sand-and-finish) floors?
Yes. Sand and vacuum thoroughly (100–120 grit), water-pop for deeper penetration (recommended), and do not precondition or pretreat. Apply by brush, squeegee, or sprayer, flooding the surface rather than wiping on and off, and work the full length of each plank while keeping a wet edge to avoid overlap. Allow 2–4 hours to dry. See the Advanced Application: Hardwood Flooring section of the application guide.
Will reactive stain work with wood fillers?
Reactive stains may react with DIY fillers made from sawdust or wood chips, but only if the filler is made from the same type of wood as the project. Store-bought "stainable" fillers usually will not react the way reactive stains do. Depending on your look, use a clear filler, a tint-your-own filler, or a contrasting filler. Weatherwood does not make wood filler or recommend specific brands.
How can I keep stain color consistent across multiple containers or production runs?
For larger projects, box all containers of the same stain together before application: combine them in one larger clean plastic container and mix thoroughly, then transfer to a smaller working container as needed rather than applying directly from individual cans.
The liquid itself may vary somewhat in appearance between containers or batches, and some settling or separation is normal. This does not necessarily indicate a difference in finished performance. Reactive stain develops its final color through its reaction with the wood, so the appearance of the liquid in the can should not be used as the color reference.
Boxing containers together helps minimize normal batch-to-batch variation. For manufactured components or large production runs, also standardize wood species, wood source, sanding schedule, application method, application amount, drying conditions, and topcoat against an approved control sample.
Why does my reactive stain look different in the can than another container or batch?
Some variation in the appearance of Weatherwood reactive stain inside the container is normal. Reactive stains are not conventional pigmented stains, and the color of the liquid in the can is not an accurate indication of the finished color on wood.
Natural settling or separation can make one container appear lighter, darker, clearer, cloudier, or slightly different in tone than another. Mix and strain the stain thoroughly before use and continue mixing as needed during application.
The best way to compare two containers or batches is to apply each stain to the same wood species using the same surface preparation, application method, and drying conditions, then allow both samples to dry completely.
If the finished wood color is significantly different under the same controlled conditions, contact Weatherwood with photos of the stained samples and the batch numbers from each container so our team can help troubleshoot.
Common Issues & Fixes
Why is my reactive stain spotty, uneven, or streaky?
Common causes:
- You may have sealed the wood by sanding too finely.
- You may not have applied enough stain.
- You may have applied stain and wiped it back off.
- You may have applied too thin a coat instead of drenching the wood.
- You may have altered the chemical composition of the product or tried to water it down.
Solution:
- Sand the wood with 80 grit in both directions to open it back up.
- Reapply stain over the entire surface, drenching the wood and allowing it to dry naturally.
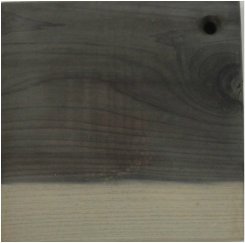
What are lap lines in reactive stain, and how do I fix them?
If you stained in sections but allowed the finish to dry mid-project, you likely created lap marks. Keep a wet edge and work in manageable sections to avoid overlap.
Solution:
- If areas are too dark from overlap, try buffing the lines lightly with 000 steel wool.
- If that does not resolve it, the best fix is to re-sand and start over.
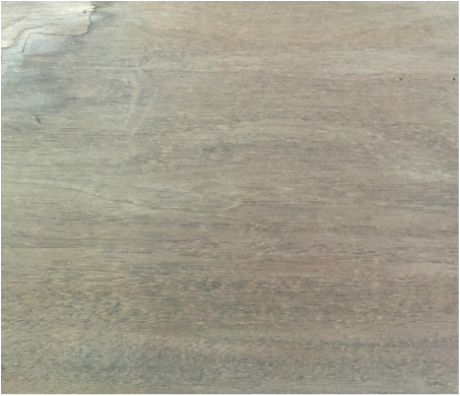
What causes sap spots or unreactive areas in reactive stain?
These usually happen where sap blocked the reaction or where a previous finish was not fully removed.
Solution:
- Sand the wood with 80 grit in both directions, especially in the areas that did not react.
- Reapply stain over the full surface, drenching the wood and allowing it to dry naturally.
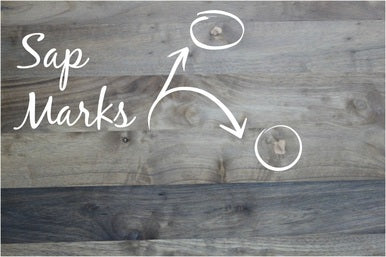
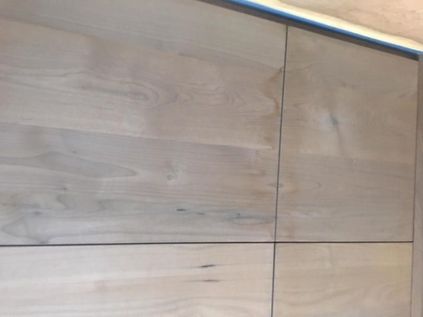
Why do brown marks appear while reactive stain dries?
These marks usually occur when too much stain was applied or drying was too slow. Make sure there are no puddles failing to dry, avoid leaving projects sitting in stain, keep the environment above 50°F, and improve airflow when possible.
Solution:
- If areas are too dark, try buffing them lightly with 000 steel wool.
- If that does not resolve the issue, re-sand and restart the application.
Oil Stains & Maintenance Oils
What are Weatherwood oil stains, and which colors are available?
Weatherwood oil stains are oil-based wood stains with penetrating oils that add color to raw or Weatherwood-stained wood while preserving the grain. Colors: Ebony Black (bold ebony black tones and contrast), Natural Clear (golden warmth and richness; darkens and warms), Rustic Walnut (rich brown warmth and depth), and White Pickling (soft white wash that lightens the tone).
Can Weatherwood oil stains be used outdoors?
No. Weatherwood oil stains are intended for interior applications. For outdoor projects, use an exterior-rated reactive stain color with the Exterior Waterproofer.
What woods can I use oil stains on?
Weatherwood oil stains are listed for hardwoods, softwoods, veneers, reclaimed lumber, and pressure-treated lumber for interior use. Final color varies with species density and composition, so test a sample before production or specification.
How do I apply Weatherwood oil stain?
Weatherwood oil stains can be applied by wipe (lighter, more controlled), spray (efficient, even coverage for production), or flood/saturation (deeper tonal development and richer character). Multiple coats increase density and produce a darker finish. Test your method and number of coats on a sample of your actual wood before starting the project.
Can I apply oil stain over Weatherwood reactive stain?
Yes. Weatherwood oil stains can be used on raw wood or on Weatherwood-stained wood. In the Weatherwood Finishing System, color comes first (reactive stain or oil stain), maintenance oil is an optional tonal adjustment, and an architectural topcoat protects the finish.
What topcoat should I use over an oil stain? Can I put water-based polyurethane over oil-based stain?
Weatherwood lists its architectural topcoats for oil stains: Varnish for cabinetry, millwork, and furniture, and Polyurethane for flooring and other high-traffic surfaces. As with any water-based finish over an oil-based product, the oil must be fully dry before topcoating, so always test the complete stain-and-topcoat system on a sample first. See the topcoat application guide.
What is White Pickling oil stain used for?
White Pickling adds a soft white wash that lightens the tone of raw or Weatherwood-stained wood while keeping the grain visible. It is also used to help keep white oak looking raw and pale under a water-based topcoat; see our white oak question in the topcoat section. Test the complete system on your actual white oak. Details are on the White Pickling page.
How much oil stain do I need?
A half pint covers approximately 100 square feet and a quart approximately 400 square feet. Coverage may be less on softwoods and depends on the application method, so allow extra for test panels and waste.
What is the difference between White and Clear Maintenance Oil?
White Maintenance Oil lightens raw and stained wood, holds the color of light-colored floors, and can create a white-wash, Scandinavian oiled-floor, or cerused look (up to three coats). Clear Maintenance Oil darkens and warms raw and Weatherwood-stained wood, holds the color of darker floors, and can reduce blue or purple tones that sometimes appear on high-tannin woods such as oak, walnut, or mahogany stained with Reclamation or Pining. Both are light, breathable oil protection and not a substitute for a hard-shell topcoat.
How do I apply Weatherwood Maintenance Oil?
Stir the oil well (and mix multiple containers together in a bucket). Apply with a rag or brush in sections, then wipe off with a clean rag after 5–10 minutes. The longer the oil sits, the whiter the effect with White oil. Never let it dry completely on the surface before wiping, which can leave streaks of permanent pigment. You can apply up to 3 coats, waiting 24 hours between coats. A floor can be used with caution after 24 hours and is fully cured after 72 hours (48–72 hours with the floor-machine method). See the Maintenance Oil application guide.
How long does maintenance oil last, and how often should I reapply it?
Maintenance oil gives light, breathable protection with an ultra-matte appearance. It does not protect to the same degree as a hard-shell Varnish or Polyurethane, so wipe spills promptly. Reapply every 1–2 years, or as needed when the finish fades.
How much maintenance oil do I need?
A quart covers approximately 400 square feet of hardwood. Coverage decreases with a floor machine, often by about 25–40%, and may also decrease on softwoods. Allow for wood porosity, product loss, and your learning curve.
Can I put varnish or polyurethane over maintenance oil?
Yes. Allow the maintenance oil to fully cure first, then apply Weatherwood Varnish (millwork) or Polyurethane (flooring). On floors, Polyurethane can also be used by itself or over cured Maintenance Oil.
How do I repair scratches on a maintenance-oiled floor?
Vacuum, then clean the area with Cleaner for Oiled Floors and a microfiber pad and let it dry. Apply Oil Refresher with a microfiber applicator pad. If scratches are still visible, sand the area lightly with very fine sandpaper (250–320 grit), vacuum or use a tack cloth, then add the same oil you used originally and buff it in, avoiding overlap. Small scratches can often be minimized by buffing a small quantity of oil. If you are unsure, contact a flooring professional. More in the application guide.
How should I dispose of rags used with oil stains and maintenance oils?
Rags, pads, and applicators soaked with oil-based finishes can heat up and spontaneously combust if left bunched or piled. Do not wad or stack them. Soak them in water or lay them flat or hang them to dry outdoors, away from buildings, before disposal, and follow the safety data sheet and your local regulations.
Topcoats & Care
Does Weatherwood reactive stain require a topcoat?
Reactive stain creates color only; it does not protect against food, moisture, dirt, or wear. For interior cabinetry, furniture, and millwork, Weatherwood recommends its Varnish; for hardwood floors and high-traffic interior surfaces, its Polyurethane; for oiled-floor looks, White or Clear Maintenance Oil. Exterior projects use Exterior Waterproofer. Always verify the complete finish on a sample board. See the hard-shell topcoat application guide.
What is the difference between Weatherwood Varnish and Polyurethane?
Both are water-based hard-shell topcoats that are self-leveling and dry clear. Varnish is for furniture, cabinetry, and millwork; Polyurethane is for hardwood floors and high-traffic surfaces. Each comes in Dead Flat (zero sheen, closest to the stained color) and Satin (about 12% sheen, which darkens the stained color about one shade). Wet topcoat may look slightly blue or purple; it dries clear.
The topcoat darkened my wood. What can I do?
A water-based topcoat over oxidized wood will darken it somewhat; Weatherwood topcoats are designed to darken the least. To reduce darkening, apply a light mist coat first. It dries faster and darkens considerably less than a heavy coat. When it is dry, follow with two full coats. Never approve color from a stain-only sample; review a fully finished sample.
How many coats of topcoat do I need, and how long between coats?
Apply thin, even coats; heavy coats can cause streaking, cloudiness, or improper curing. Plan on 2–3 coats for surfaces that contact water (up to 3 for superior protection). Brush application: about 60 minutes between coats. Spray application (thin product 15% with water): about 120 minutes between coats. Apply additional coats within 4 hours or after 24 hours. Do not apply below 50°F or in direct sunlight, and stir rather than shake.
How long until I can use the surface, and how do I clean it?
Do not touch for 24 hours after the final coat. Allow 7–10 days before light use; full cure takes 30 days. After curing, clean with a water-damp microfiber cloth; for deeper cleaning add a drop of dish detergent or vinegar. Use coasters, mats, and trivets, and wipe spills immediately. Avoid oil-soap and silicone-based cleaners and dusting sprays, which can contaminate the finish and prevent adhesion of future finishes.
Can I use another brand of polyurethane, varnish, or a post-catalyzed finish?
We cannot guarantee compatibility or the final color with every topcoat on the market. Reactive stains typically do not peel, crack, flake, or blister under other brands, but off-brand finishes may not preserve the oxidized Weatherwood look. With post-catalyzed (post-cat) finishes there are no known negative effects on durability or sealing and most woods turn out beautifully, but on certain oak species the finish, wood, and stain can react to produce a fumed-oak look instead of the expected Weatherwood tone. Test the exact combination on your actual wood.
How can I keep white oak looking natural without turning yellow?
A pale, natural white-oak look depends on both the color treatment and the protective finish. Some topcoats warm or darken the wood even when they dry clear. Weatherwood White Pickling oil stain and White Maintenance Oil can be tested as appearance options under a water-based topcoat, but no finish should be assumed to prevent all future color change. Test each complete system on your actual white oak before approving it.
Exterior Projects & Waterproofing
Which Weatherwood stain colors can be used outdoors on decks, fences, and siding?
Six reactive colors are rated for exterior as well as interior use: Beachwood (beachy weathered wood), Carbon Timber (blackened, charred look), Corralwood (ranch-style brown), Pining (rustic grays and browns), Salvage (medium gray and brown), and Reclamation (gray weathered tones). The other twelve reactive colors are for interior use. Reactive stain changes the color of the wood; it does not replace exterior moisture protection, so follow it with Exterior Waterproofer.
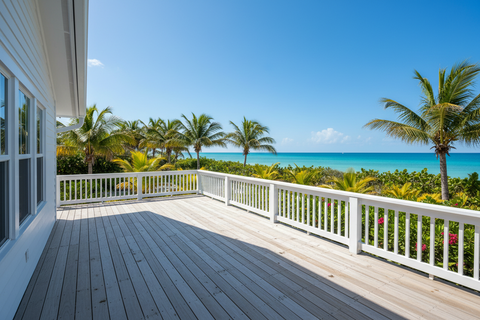 Beachwood
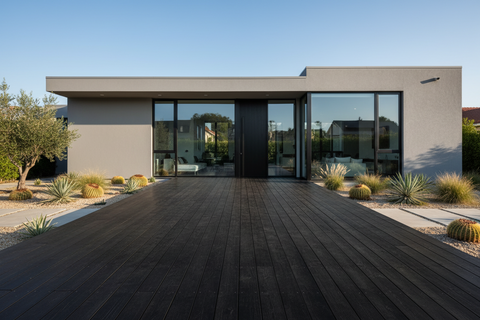 Carbon Timber
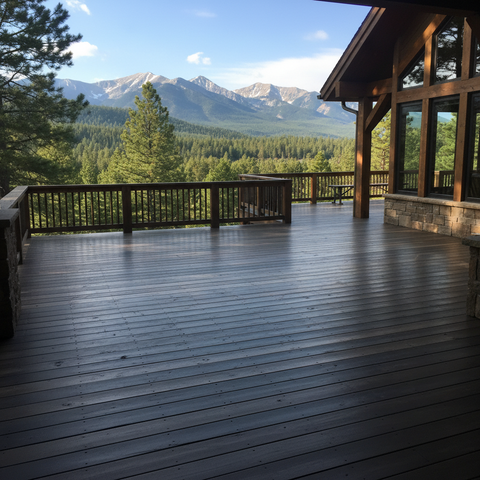 Corralwood
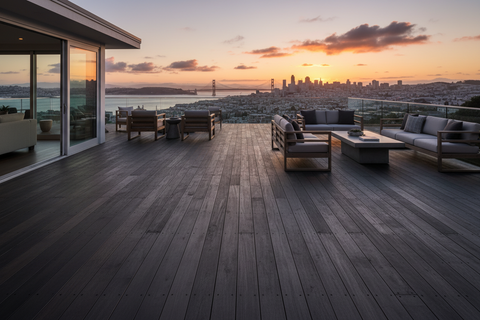 Pining
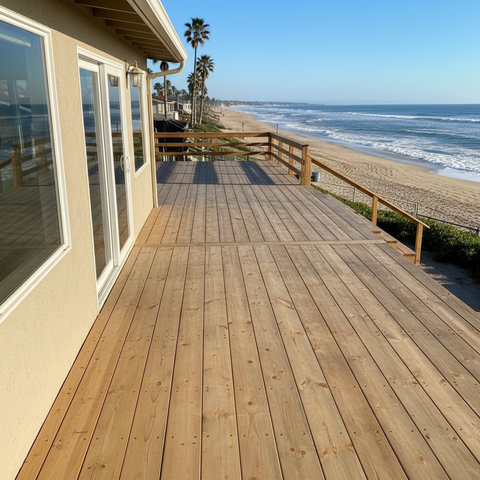 Salvage
 Reclamation
Will a reactive stain peel like a film-forming deck stain?
No. Weatherwood reactive stain is non-film-forming: it changes the color of the wood rather than laying a colored coating on top, so the color itself cannot chip or peel off. Wood still weathers naturally, so follow the exterior protection and maintenance instructions rather than assuming a deck is maintenance-free.
Can I apply Exterior Waterproofer over wood that is already sealed?
No. Exterior Waterproofer must soak into the wood to work. Apply it to raw, unsealed wood or Weatherwood-reactive-stained wood that has not been sealed. A hard-shell sealer, film-forming finish, traditional polymer stain, or Maintenance Oil blocks absorption, so the product will not penetrate or protect. See the Exterior Waterproofer application guide.
Do I apply Exterior Waterproofer before or after reactive stain?
After. Apply the exterior-rated reactive stain first and allow it to dry completely, then apply Exterior Waterproofer to the still-unsealed, reactive-stained wood. Exterior Waterproofer can also be applied directly to raw wood when you are not adding stain color.
How do I apply Exterior Waterproofer?
Mix well before and during use. Do not thin. Apply when the wood, product, and air temperature are between 50°F and 80°F. Do not apply during rain, immediately before rain, or in direct sunlight when the surface is hot.
Exterior Waterproofer may be applied by brush, roller, or spray. Apply an even, generous coat and make sure all surfaces, especially end grain, are fully covered. Brush out any puddles or areas where excess product collects. Allow the wood to air dry.
Apply the second coat 24 hours after the first coat.
The wood may appear darker while the product is wet and will lighten again as it dries.
How often do I reapply Exterior Waterproofer, and can I apply it over the old coat?
As a general maintenance guideline, reapply Exterior Waterproofer every 2–4 years, or sooner when water stops beading on the surface and begins absorbing into the wood.
A previous application of Exterior Waterproofer does not need to be stripped before maintenance. Clean the wood, allow it to dry, and reapply according to the application instructions. Exposure, wood species, orientation, climate, and horizontal surfaces can all affect maintenance intervals.
Do exterior tabletops need extra protection?
Exterior tabletops may need additional protection against food and staining. Weatherwood does not currently offer an exterior hard-shell product. A hard-shell sealer should not be applied underneath Exterior Waterproofer because it would prevent the Waterproofer from penetrating the wood. If using a third-party exterior topcoat, follow the manufacturer's instructions and test the complete finishing system for compatibility and appearance first.
Ordering, Storage & Support
How much Weatherwood stain do I need for my project?
Check each product page for specific coverage. Most reactive stains cover about 400–500 square feet per gallon; oil stains and maintenance oils list their own coverage (a quart covers about 400 square feet). Wood porosity, waste, and your learning curve all matter, so buy 10–15% extra rather than risk running short and having to match color later.
What is the shelf life of Weatherwood products, and how should I store them?
Unopened product lasts one year when stored between 50°F and 80°F and kept out of sunlight. Once opened, oxygen can deteriorate coatings, so close containers tightly; with plastic containers, make sure the lids click shut.
How should I store stained wood before installation?
Dry stack stained wood with space gaps, ideally stain it, let it dry, and install shortly after. Do not store stained wood in plastic, which can create a greenhouse effect and alter the color.
How do I know which Weatherwood products I need?
Weatherwood is a four-step system: (1) create the color with a reactive stain or oil stain, (2) optionally refine the tone with White or Clear Maintenance Oil, (3) protect with Varnish or Polyurethane, and (4) for exterior projects, protect with Exterior Waterproofer. Start with the color chart, then contact us with your wood species and photos if you want a recommendation.