HARD SHELL TOPCOAT APPLICATION
SPRAY APPLICATION
Here's a video on how to apply Weatherwood Hard Shell Topcoats over raw or Weatherwood stained wood with a gravity sprayer. A gravity sprayer will give you great results for a smooth finish. (How to Apply BOTH Weatherwood Varnish and Polyurethane Topcoats)
PREP
- Remove all dust from wood's surface.
- Stir polyurethane, do not shake.
APPLY
- To apply WW Hard Shell Topcoats are water-based. For spray gun use, thin product 15% with water.
- Use an atomized gun with the mixture.
- Apply product using broad sweeping motion and overlapping streams.
- Wet topcoat may look slightly blue or purple, but will dry clear.
SECOND COAT
- Apply up to 3 coats of polyurethane, for superior protection.
- Dry time between coats 120 minutes. Apply additional coats within 4 hours or after 24 hours.
- Do not touch for 24 hours after final coat is applied. Light use after 7-10 days.
- Full cure time for hard shell topcoats is 30 days.
TROUBLESHOOT
- When you apply a topcoat to wood, the wood may darken. That's because you've oxidized the wood and then added a water-based topcoat over top. To decrease this effect, you an apply a light "mist coat" first. This is a light misting of topcoat, which will dry much faster than a heavy coat and darken considerably less. Once the mist coat is dry, topcoat with 2 more heavy coats.
Brush Application
To apply Weatherwood Hard Shell Topcoats with a brush you want a good quality brush or have a couple of sponge brushes ready. Neither should leave brush marks, as topcoats are self-leveling. We prefer to use the sponge brush, two in fact. One to apply the topcoat and another to wipe off any drips, overlap, or bubbles. (How to Apply BOTH Weatherwood Varnish and Polyurethane Topcoats)PREP
- Remove all dust from wood's surface.
- Stir polyurethane, do not shake.
APPLY
- Apply a light coat of sealer. Use short strokes and very light pressure. Do not drag the brush on the wood.
- Once the wood surface is covered, you can use long, light strokes to even out.
- Apply in sections when working on a large project. Keeping a wet edge as you work.
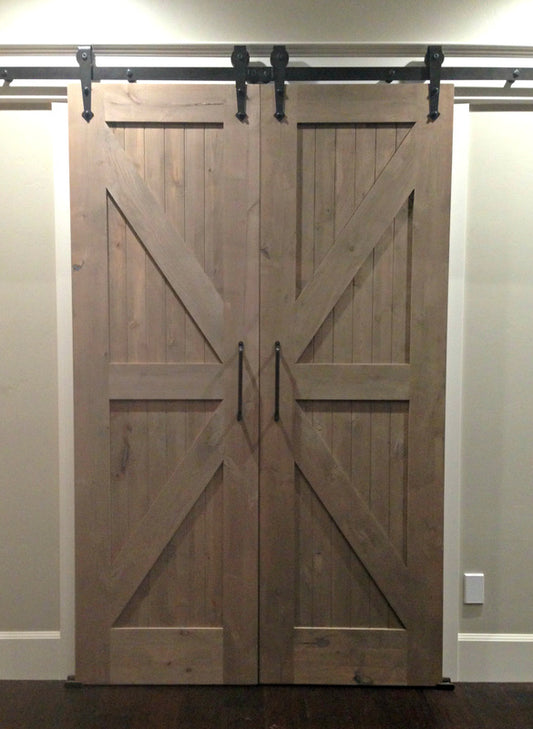
- On a difficult project like a door, we used angled sponges to make sure the crevices were all covered.
- Wet topcoats may look slightly blue or purple, but will dry clear.
SECOND COAT
- Dry time between coats 60 minutes.
- For projects that come in contact with water, it's essential to apply 2-3 coats. Apply additional coats within 4 hours or after 24 hours.
- Do not touch for 24 hours after final coat is applied. Light use after 7-10 days.
- Full cure time for hard shell topcoats is 30 days.
TROUBLESHOOTWhen you apply a topcoat to wood, the wood may darken. That's because you've oxidized the wood and then added a water-based topcoat over top. To decrease this effect, you an apply a light "mist coat" first. This is a light brush application of topcoat, which will dry much faster than a heavy coat and darken considerably less. Once the mist coat is dry, topcoat with 2 more heavy coats.
SQUEEGEE/ LONG HANDLED STAIN BRUSH FOR POLYURETHANE
Apply polyurethane with a high quality, long-handled stain brush or squeegee.
PREP
- Remove all dust from wood's surface.
- Stir polyurethane, do not shake.
- Remove excess fibers from stain applicator with painter's tape before using.
APPLY
- Using smooth, long strokes, apply the polyurethane starting at the edge of the room, with the natural-bristle brush or squeegee, in the farthest corner from the door.
- Maintain a wet edge and move slowly and deliberately so as to not create bubbles in the polyurethane.
- Use the stain applicator as you move towards the center of the room.
- With each pass, overlap your strokes slightly to feather the starts and stops together for a more uniform coat.
SECOND COAT
- Apply up to 3 coats of polyurethane, for superior protection.
- Dry time between coats 120 minutes. Apply additional coats within 4 hours or after 24 hours.
- Do not touch for 24 hours after final coat is applied. Light use after 7-10 days.
- Full cure time for hard shell topcoats is 30 days.
CAREAllow it to dry for 7-10 days before light use. Full topcoat cure time is 30 days. As a fine furniture finish care is important. After you finish has cured, the best way to clean is with a rag dampened with water. If your surface requires deeper cleaning we suggest adding a drop of dish detergent or vinegar. Be sure to use coasters, mats and trivets. Wipe spills immediately and only use a water damp microfiber cloth and mild dishsoap to clean. Important: Avoid using any oil-soap or silicone-based daily cleaners or dusting sprays. These products contaminate the finish and can prevent the adhesion of future finishes.
-

The Drying Varnish Looks Blue-ish, As It Dries, it Looks More White than Blue
-

Then the Topcoat Disappears
Additional Videos
VARNISH / POLYURETHANE SCRATCH REPAIR
- Vacuum the floor or remove dirt from wood surface.
- Clean with oil-free floor cleaner
- Smaller scratches: Apply a Wood Floor Polish to repair smaller micro scratches with a Microfiber Cleaning Pad
If you still think the scratches are visible:If you’re not sure how deep the scratches are, and whether you need to sand your floor, we recommend you contact a flooring professional. If you want to proceed on your own, do so with caution. Repairs are tricky!
- Note: If you're just applied a Wood Floor Polish, they contain wax and will need to be removed or wear down before proceeding.
- Sand the area with very fine sandpaper. ex. 250-320 grit
- Vacuum the floor/Use tack cloth to remove dust.
- Use an artists's brush to apply, and make sure you choose the same poly you used previously. Make sure to avoid overlap.
- Use painter's tape to tape off the damaged wood plank.
- Remove overlap or raised grain with 0000 steel wool, using very LIGHT pressure.
- Use a good brush to apply a LIGHT coat of poly to entire plank. Remove tape while poly is WET.
VARNISH / POLYURETHANE SCUFF REPAIR
1. Use A Sponge And Water.For marks that have been on the wood floor for awhile, or are more stubborn, this method won’t work. However, if you know that the mark on your floor is fresh, this simple technique can be used to get those annoying marks up without much effort.
- Simply dip the sponge in some warm water, and gently wipe away at the mark until it’s gone.
- Clean up the area around the scuffs with a sponge or cloth and a mild detergent formulated for use on wood floors.
- Since you may have to rub the scuffs vigorously, you must remove dirt, grit or any other abrasive debris that may scratch the surface of your wood.
2. Scrub Them With Baking Soda.If Scuff Does Not Resolve, Try Baking Soda. This Is One Of The More Effective Methods At Removing Difficult Marks.
- Mix about 2 tablespoons of baking soda with warm water until you have a smooth (not runny) paste.
- Next, use a soft cloth to scrub the marks away with the paste. Buff the affected area with a damp cloth until the scuff disappears.
- Finally, wipe the area with a clean, damp cloth, and then wipe it dry. This method is best for heavily scuffed areas.
3. Grab a NEW tennis ball. This method is effective for the largest, toughest scuff marks. Make sure the tennis ball is clean. If you use a dirty one, it can easily scratch or stain the floor. Essentially, you’re going to cut a hole into a tennis ball, stick it on the end of a broom handle, and use your leverage to rub away at the mark until it’s gone.
- Cut a small, ¼” X into the tennis ball. To avoid cutting yourself, make sure you place it on a firm surface instead of holding it in your hand.
- Insert the top of a broom handle into the X.
- Using the end of the broom with the tennis ball on it, firmly rub away the marks.
How should I deal with an oil spill?
The answer to this is ‘quickly’. If something oily spills onto your wooden floor or furniture, spring into action straight away. The faster you act, the more likely you are to prevent stains. If you deal with the stain straight away, the newspaper and detergent method will likely be enough. Here’s how…
- Blot the stain with newspaper as soon as it happens.
- Mix up a mild dish detergent solution in a bowl. Spread the suds only over the stain (too much water can damage the wood further).
- Use a soft rag to rub the suds vigorously over the oil spot.
What can I do about stubborn oil stains?
If you’re dealing with a stubborn oil stain, don't despair. Fuller’s earth can help get rid of unyielding oil stains. Fuller’s earth is a clay based material that absorbs oil.
- To use Fuller’s earth on wood, simply sprinkle it over the stain and leave it for at least ten minutes for it to absorb the oil.
- Scrub it off with a stiff bristled toothbrush, then clean with detergent and buff dry.
If the stain proves to be extra stubborn, mix in some Fuller's earth with a little bit of water, spread it on the stain, and leave it for 24 hours. Work the paste off using a palette knife or a similar object, and be careful not to scratch your wood. Follow with a quick clean and buff.
How should I deal with a red wine spill?
The answer to this is ‘quickly’. If red wine spills onto your wooden floor or furniture, spring into action straight away. The faster you act, the more likely you are to prevent stains. If you deal with the stain straight away, you are most likely going to clean it up with an absorbent cloth. Here are a few methods that have worked in the past.
- Blot the red wine spill with a damp absorbent cloth immediately as it happens. Make sure to just blot the spot; do not rub it since rubbing might spread the wine over even more of your wooden surface. Continue blotting until there is no more red wine on the table. Use a soft, dry towel to dry the area. If some red wine stain remains, continue with the following steps.
- Soak a cloth with vinegar and water and lay it over the wine stain, allowing the vinegar to soak up the red wine. Keep your eye on the area, lifting the cloth every so often to see if the wine stain is lightning. Soak a new cloth with a vinegar and water solution and gently scrub the area.
- To remove chemicals from a polyurethane finish try using a hot iron over brown paper over the stain.
- Mix in enough linseed oil to rottenstone in a small bowl to make a paste. Rub the paste lightly on the stained area. Make sure to rub it in the direction of the grain of the wood. Let it sit for 30 minutes. Remove the paste with a dry cloth.
- This method is effective but may compromise the look of the finish. Make a paste of equal parts baking soda and water, if the stain has penetrated the polyurethane and isn't coming out fully with the soap treatment. Test the baking soda on an unobtrusive area. The slight abrasive quality of baking soda can help remove the stain, but may leave the finish looking dull, so may have to reapply finish!
How can I protect my wood from future stains?
You can't prevent accidental spillages, but there are some things you can do to help protect the wood in your home. Because wood is porous, oil spills and dust can get absorbed quickly, leading to unsightly stains before you know it. Help prevent this by regularly cleaning your floors and furniture. Daily cleaning is recommended for wooden floors, and at least once a week for furniture. Polish your wood regularly and make maintenance a regular part of its care. Wood floors and furniture provide a beautiful talking point in your home, lending a rustic, warm ambience. Maintain them properly and deal with spills as quickly as you can to prevent stains and to keep your wood looking lustrous.


